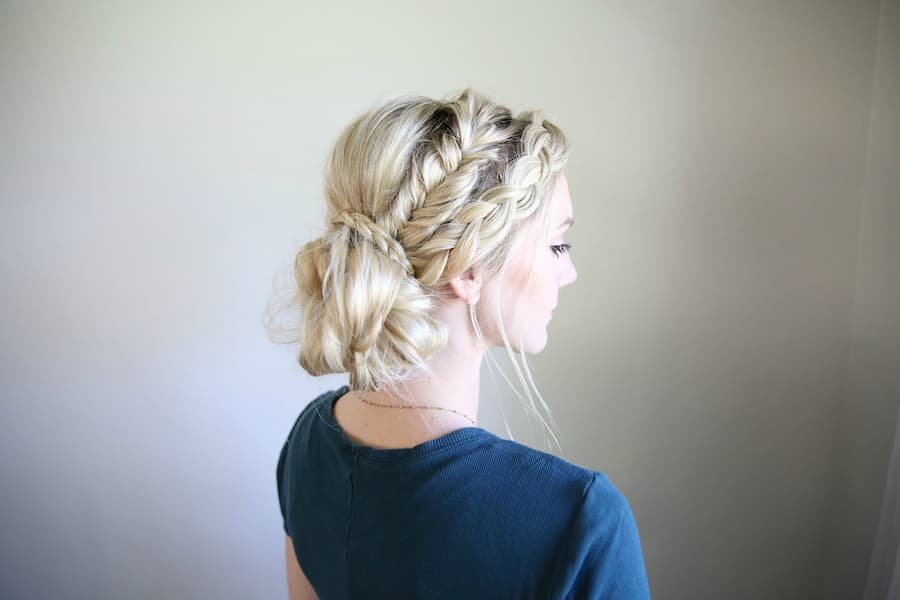
When done right, the Dutch Braid style will add feminine beauty to your hair. This style is easy to master, versatile, and easy to wear. Learn how to twist the braid into two buns and keep the twisted edges hidden to make it look fuller. To finish, use hairspray to hold the braid in place. This article covers all the steps to creating a beautiful Dutch braid style. So, get ready to have the most feminine hairstyle ever!
Table of Contents
Dutch Braids Add Femininity
The trending style of Dutch braids is the small, tight ones. These styles are especially flattering on oval and round faces. They can be made more noticeable by adding accessories like clip-in extensions. If you want to make your braids a little less tight, opt for a looser version. This style will give your hair an air of effortlessness. And if you don’t have the time to create your own hairstyle, simply buy a kit and learn the basics of Dutch braiding.
Another variation of this style is the Dutch halo braid. This braid is perfect for special occasions, as it highlights cheekbones. Adding colored hair extensions to your braids is a good way to add a splash of color. Simply braid different sections of hair with colored extensions. The resulting look will be dazzling! And while it’s simple, you can also experiment with different colors and shades.
They Are Easy To Create
The Dutch braid is a classic hairstyle that looks great on both women and men. This style is relatively easy to do and can be completed within five minutes. To begin, divide your hair into three sections. Braid each section by wrapping one strand around the other. Repeat the process until you reach the crown. You can skip the pulling loops if your hair is short or you are braiding it in a tight Dutch braid.
Divide a small portion of hair from the crown of your head into three sections. Hold one strand in your right hand and the other two strands in your left. Use your index finger to bring the right strand under the middle strand. Cross the left strand over the middle strand. Repeat this procedure, adding hair every two to three inches. To finish your Dutch braid, switch to a standard three-strand braid at the nape of the neck.
They Can Be Twisted Into Two Buns
You can wear a pair of Dutch braids arranged close together. You can also leave one crooked for a unique look. These braids are thick all the way down and will sweep across the crown area. This style is great for formal events because you can wear it on either side of the face or with a dress. Here’s a quick tutorial:
First, part your hair in two. Split a small section of your hair. Twist the left strand, then cross it over the right strand. Pin the new strand to the left side of the bun. Continue this step until you’ve finished twisting your hair. If you don’t want your hair to look too messy, use clips. You can also pin the ends of your hair.
They Are Heat-Free
When putting together a Dutch braid, you should use a texturizing spray to make it look more natural. Texturizing spray, such as the one from L’Oreal Paris Advanced Hairstyle Boost It Air-Blown Texture Mist, will give your tresses a textured finish. Spritz the roots of your hair and then start braiding. This will create a natural, sleek look that you’ll love!
To create a classic Dutch braid, you should start by parting your hair in the middle. Section the hair down the middle to the nape of your neck. You can also use a hair extension to add some volume to your locks. Use a tail comb to divide the hair into two parts. Next, twist the right side and put the left piece underneath the middle. Once that’s done, add more hair from above the braid.
Read Also: The Best Ways To Deal With Thinning Hair for Women

