
Picture this: You’ve got a sleek stainless steel tumbler, and you want to jazz it up with some vibrant designs. The secret? A special sublimation coating for metal surfaces. It’s like preparing a canvas for painting, but instead, we’re prepping your tumbler to bond beautifully with sublimation ink under the heat. It’s all about that perfect marriage between the coating and ink to bring your designs to life.
Table of Contents
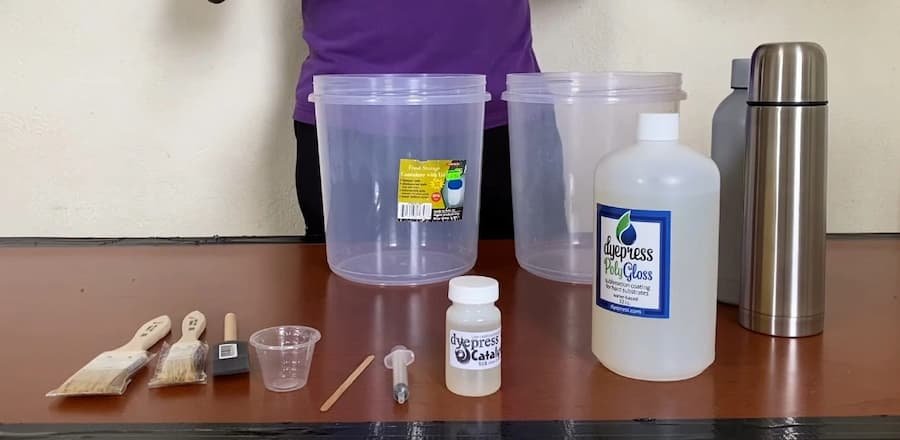
Materials required to sublimate stainless steel:
First things first, let’s talk about our toolkit. It’s like gathering our art supplies before we get messy. To kick things off, you’ll need:
- Sublimation Printer: Our magic wand for transferring designs.
- Sublimation Paper: Think of this as the carrier pigeon for your artwork, from printer to product.
- Sublimation Ink: The lifeblood of our project, adding color and vibrancy to your designs.
And now, for the main actors in our show:
Stainless Steel Objects or Sheets:
Start with a spotless, shining piece of stainless steel. This will be our stage where the magic happens.
Sublimation Coating Solution:
This special potion allows our sublimation inks to cling to the stainless steel, ensuring your design is as durable as it is dazzling.
Spray Gun or Airbrush:
Our paintbrush for applying the coating. It’s all about laying down a smooth, even layer to make sure every inch is ready for your masterpiece.
Ventilation System:
Art should be breathtaking, but not literally! If you’re working indoors, keep the air moving to stay safe from any fumes. Donning safety goggles, gloves, and a mask is also a smart move.
Drying Equipment:
We’ll need to bake our creation, not in a kitchen oven, but with a heat gun or another heat source. This step is crucial for ensuring the coating is set and ready for the big reveal.
Sandpaper:
Think of this as the pre-show prep, roughening up the stainless steel just a bit to make sure our coating sticks like glue.
Cleaning Materials:
Acetone or alcohol will be our cleanup crew, ensuring the surface is pristine and ready for its transformation.
Protective Covering:
Lastly, let’s not turn our workspace into a paint-splattered crime scene. Covering up helps keep things tidy, letting us focus on the fun part.
Preparing a Stainless Steel Tumbler for Sublimation:
Sublimation on stainless steel tumblers is not just fun; it’s like magic! You’re turning everyday objects into personalized treasures. But, to ensure our magic trick works every time, we need to prep our tumblers just right. It’s all about making that tumbler a perfect canvas for your designs.
Tumbler Cleanup:
Imagine giving your tumbler a spa day. Start with a warm, soapy bath, scrubbing away any grime or oils with sandpaper and a gentle touch. We want the tumbler clean, but we also want to show it some love. Once it’s sparkling, pat it down with a lint-free towel, making sure it’s as smooth as a mirror and ready for its makeover.
Apply the Coating:
Here’s where you get to play chemist. Whether you choose a polyester spray or a sublimation coating liquid, think of it as your potion for ensuring your designs stick and stay vibrant. Follow the potion’s—ahem, I mean the product’s—directions closely. A nice, even coat will make all the difference, ensuring every inch is primed for your artwork. Some coatings might need a second layer, so don’t be shy; just make sure each layer is applied with love.
Cure the Coating:
Curing is like sending our tumbler to the gym to get buff. It needs to withstand the heat and bond with your design. This step requires a bit of patience and precision—follow the temperature and time settings to the letter. Whether you’re using an oven or a heat press, this is what turns your coated tumbler into a sublimation-ready champion.
Clean and Ice the Tumbler:
After a good workout, our tumbler needs to cool off. Let it come back to room temperature, giving it time to relax. Then, with a clean, dry cloth, give it a gentle wipe. This isn’t just about cleaning; it’s about preparing the surface to receive your designs with open arms.
By following these steps, your stainless steel tumbler won’t just be ready for sublimation; it’ll be eager for it. This process not only boosts the print quality but also ensures that your creative designs will last as long as your memories. Now, with your tumbler prepped and waiting, the real fun begins. What designs will you bring to life? Whether for yourself or as thoughtful gifts, the possibilities are endless and exciting!
The Step-by-Step Procedure:
Prepare the Stainless Steel:
We’re starting with a clean slate. Make sure your stainless steel is spotless and free from any unwanted layers. It’s like prepping a canvas for a masterpiece.
Surface Preparation:
Now, let’s give that surface a little texture. It’s sandpaper time! Begin with the rough stuff and gradually work your way down to the finer grits. It’s all about creating a smooth canvas that’s just rough enough to hold onto our next layers.
Cleaning:
Before we get to the fun part, we need to make sure everything is squeaky clean. Use acetone or alcohol to wipe away any dust, dirt, or greasy secrets. A pristine surface means our coating will stick like a dream.
Apply Sublimation Coating:
Here’s where the magic starts. Grab your sublimation coating solution—each one comes with its own set of directions, so give those a good read. Using a spray gun or airbrush, apply a smooth, even coat. Remember, safety first! Gear up with protective equipment and ensure you’re in a well-ventilated space.
Drying:
Patience is key. Let your masterpiece-in-the-making dry thoroughly. You can use an oven set to the recommended temperature or a heat gun, whichever fits the bill for your coating.
Curing (if necessary):
Some coatings like to be extra and require a curing process. This step is all about making your coating tough and ready for action. Follow the instructions to the letter.
Test the Coating:
Before we dive into the full monty of printing, let’s do a quick test run. Print a small design and transfer it onto your coated surface. It’s like a dress rehearsal for your tumbler, ensuring everything looks stellar.
Sublimation Printing:
Confidence in your coating? Perfect! Now, print your masterpiece on sublimation paper with your design front and center. Make sure it’s all aligned and ready to impress.
Heat Press Transfer:
It’s showtime! Place your design on the tumbler, secure it, and apply heat and pressure with your heat press or mug press. This is where the magic truly happens, transferring your vision onto the tumbler.
Cooling and Inspection:
After the grand reveal, let your tumbler cool off. Gently peel off the paper and admire your work. It’s the moment of truth—how did your design hold up?
Creating a sublimation masterpiece on stainless steel is a bit of an art and science combo. It might take a few tries to get it just right, but that’s all part of the creative process. With a bit of patience and experimentation, you’ll be churning out stunning, durable designs in no time. Each step is a learning opportunity, bringing you closer to sublimation perfection.
Benefits of Sublimating Stainless Steel:
- Durability: Picture this: your art, surviving every adventure, every drop, every moment, without a scratch or fade. Stainless steel is tough, ready to stand up to whatever life throws at it, making it the perfect partner for designs that are meant to last.
- Elegance: There’s something about stainless steel—the way it feels, the way it catches the light—that adds an instant wow factor to your work. It’s like giving your designs a sleek, modern frame that says, ‘I’m here, and I’m fabulous.’
- Versatility: Whether it’s a tumbler, a water bottle, or even a piece of jewelry, stainless steel items are like blank canvases waiting for your creative touch. They’re the perfect way to personalize gifts or craft unique items that really stand out.
- Vibrant Colors: If you’ve ever seen colors pop on stainless steel, you know what I’m talking about. The sublimation ink and coating come together in a burst of color that’s truly something to behold. Your designs don’t just show up; they make an entrance.
- Endless Possibilities: From marketing swag that gets noticed to personal gifts that touch the heart, sublimating on stainless steel opens up a whole new world of creative potential. It’s your chance to make something memorable, something truly unique.
Conclusion:
Diving into sublimation on stainless steel isn’t just about exploring a new medium—it’s about unlocking a new level of creativity and durability for your designs. By following the steps we’ve covered, you’re set to turn everyday items into extraordinary keepsakes or eye-catching business products. It’s not just about making something beautiful; it’s about crafting something that lasts, something that carries your signature style with elegance and resilience. So, why not start experimenting and see where your creativity takes you?
FAQs:
- Q: Can we use any stainless steel for sublimation coating?
A: Ideally, you should use stainless steel that’s designed for sublimation. It’s all about getting that flawless finish and ensuring your designs come to life just the way you imagined. - Q: Can I sublimate on metal?
A: Absolutely! Metal is a fantastic medium for sublimation, offering durability and a unique finish that really makes your designs pop. - Q: Can we do sublimation in the oven?
A: Yes, you can! An oven can be used to cure your sublimation coating, making sure it’s all set for printing. Just remember to follow the temperature and timing guidelines to get it just right.
Check out the rest of the ‘Updated Ideas‘ site; there are some cool articles waiting for you! Fancy writing for us? Just give that contact button in the top right a tap. Cheers!